How to Set Up a Solid-State Drive (SSD) in Windows
Introduction
 By now, most people have at least heard of “solid state drives” (or SSDs for short), but we might as well refer to them as “super-speedy drives” given how they’ve revolutionized personal computing.
But what is an SSD, and how would the typical home computer user, photo enthusiast, or gamer use one? This article will teach you the basics of SSDs with just a bit of technical jargon, and will then provide the steps you’ll need to take to set one up in your computer.
A Very Brief History of SSDs
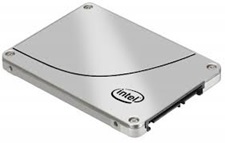
Intel brought SSDs into the consumer mainstream with its x25-m model in 2008, which it replaced in 2009 the x25-m G2 model, shown to the right. Intel offered for the first time an SSD with the three key ingredients for success:
- uncompromised performance in all drive-related use versus traditional hard drives;
- reliability; and
- a price that consumers could at least wrap their heads around (80GB for ~$250)!
What’s Inside an SSD?
 An SSD is a data storage device that uses “solid state” (electronic) components to store data, rather than spinning mechanical components like hard drives, which are a lot more similar to an old record player than you might think! The three major components of SSDs are:
- the “NAND memory” chips, which store data;
- the “controller”, which moves data; and,
- the “firmware”, which acts as the operating system for the SSD (and which in some unfortunate circumstances, can crash just like any operating system, leading to data loss).
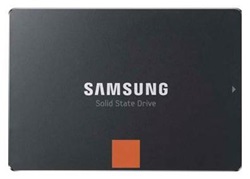
Samsung has made a name for itself in providing reliable and high-performance SSDs, like the 840 model pictured to the left. Perhaps not surprisingly, it is one of the few companies left that manufactures all three of the major components in its SSDs. [Update: years after the release of the 840, it and its successor the 840 Evo were found to have fairly serious issues related to NAND design that caused significant slowdowns. As of our most recent update, only Crucial has been able to avoid any serious firmware or hardware flaws].
Physical Characteristics of SSDs
Designed to fit the 2.5″ standard long associated with laptop hard drives, SSDs will appear to be extremely small to anyone familiar with big, heavy 3.5″ desktop drives. The 1″ difference in the nomenclature doesn’t even begin to truly describe the size difference – a 2.5″ SSD is about the size of your average smartphone but much lighter! While SSDs can differ in thickness (e.g., 9.5mm or the thinner 7mm required for some notebooks), they will all be the exact same length (100mm) and width (70mm).

An mSATA SSD
There are three other form factors for SSDs, two of which are essentially already obsolete as of our most recent update. First is the 3.5″ size, which never made a lot of sense, since it was simply designed to conform to desktop drive mounts, and was mostly a hollow shell. Second is the micro SATA (or mSATA) drives, which take the components in a 2.5″ drive and shrink them into a device the size of a matchbox, as shown here.
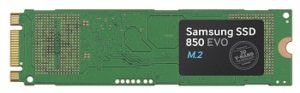
An M.2 2280 SSD
There was nothing inherently wrong with this design, but in 2015, most motherboard manufacturers switched over to the M.2 format, shown to the right. It’s not actually any smaller, but it allows for more advanced SSD technologies to be used, including the ultra-fast PCIe interface. There are officially four sizes of M.2 drives, 2242 (40mm), 2260 (60mm), 2280 (80mm), and 22110 (110mm), but only 80mm models obtained widespread market adoption.
Installing an SSD
Now that you’ve learned a bit about the basics of what an SSD is, you’re ready to set up your own SSD. The first thing you need to know is that SSDs will perform faster and have a longer lifespan if used with Windows 7 or later operating systems. Some versions of Linux and Macintosh OS 10 also provide the necessary features to get the most out of an SSD. The feature that these operating systems have in common is what’s called the “TRIM command”, which basically allows the operating system to manage the memory built into the SSD by preparing blocks of memory for writing data in the background. While an SSD will work on older operating systems like Windows XP or Vista, it will likely become slower over time, and the lifespan will likely be shorter.
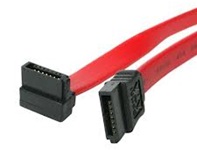
SATA Data Cable
Another key to getting the most out of an SSD is connecting it to the right interface on the motherboard. The interface seems quite simple: all consumer SSDs connect to the motherboard via the SATA (or mSATA) interface, and motherboards should come with the cable required to connect it. The SATA cable is typically a flat red or black cable with the a straight or 90-degree connector at each end, shown to the left. You’ll also need to connect the SSD to the power supply using a similarly-shaped (but wider) SATA power cable, pictured to the right.
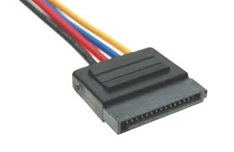
SATA Power Connector
The trick here is that while most SATA cables do the same thing, not all SATA motherboard ports are the same, even if they look identical. For any modern SSD, it’s best to have a SATA port rated at 6 Gigabits per second (6Gbps), rather than 3Gbps. And even then, not all 6Gbps ports are the same – the ones connected directly to the Intel chipset on a motherboard are the best (and those in AMD chipsets for use with AMD CPUs are slightly behind). The third-party SATA ports used on many motherboards in addition to the “native” ports operate at a slower speed even if rated at the same 6Gbps. Reading the motherboard manual may help to identify these, but the easiest option is almost always to plug the SSD into the lowest-numbered SATA ports, which are usually labeled SATA 0 and SATA 1.
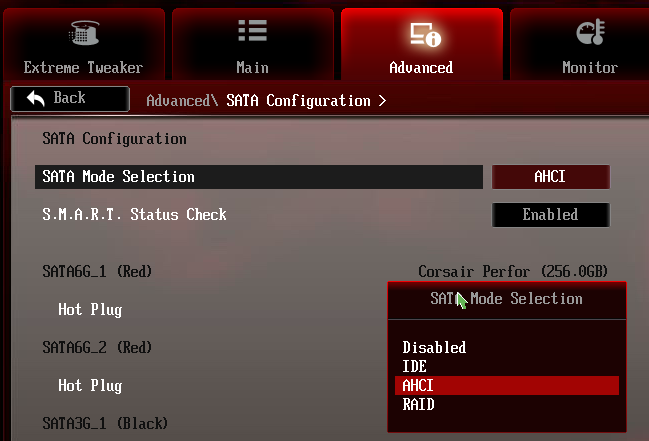
Finally, the motherboard must be set up to communicate with an SSD effectively. This typically means changing a setting in the BIOS (accessed from the boot screen by pressing a certain key, such as F2 or F8, as indicated at bootup). The setting is called “Advanced Host Controller Interface” (AHCI), and it’s found in a BIOS menu. It’s an alternative to the older “IDE” standard, which will still work, but using AHCI will help the SSD to achieve its maximum speed potential. The picture below illustrates what this selection looks like in a modern UEFI (formerly known as the BIOS).
What if you forget that step and load up your operating system, boot into Windows, and then realize that you never changed the AHCI setting? Can you go back and change it now? Well, if you go into the BIOS and change it once the operating system is loaded, it will lead to a scary bluescreen crash. But have no fear – Microsoft provides an incredibly easy fix for Windows 7 users on the Microsoft Support Website, which automates the preparation within Windows. Once you use that fix, you can enter the BIOS upon a restart and switch the setting from IDE to AHCI. For Windows 8/8.1 users, the process isn’t automated, but Microsoft still provides a step-by-step fix.
So, to review, here’s a checklist to keep in mind for optimal performance:
- use Windows 7 or later
- plug the SSD into SATA ports 0 or 1
- set the motherboard to AHCI mode before loading the operating system, but if you forget to do so, you can do so afterwards by following the instructions linked above from Microsoft.
A Word on Cloning
One area where SSDs differ in operation from hard drives is how the operating system sorts the data on the SSD. Hard drives have physical “sectors” on them, while SSDs do not – if forced to conform to hard drive sector size, SSDs will become “misaligned,” causing them to perform worse and experience shortened lifespans. When the data from a hard drive is moved (or “cloned”) to an SSD without taking these differences into account, the sectors will end up misaligned. The easiest way to avoid this outcome is to install the operating system from scratch on an SSD and reinstall all your applications. But what if you already have your operating system and all your applications on a hard drive and don’t want to do all that extra work?
There are certain data migration programs that not only move data, but also align the sectors of the SSD so it won’t be forced to “think” like a hard drive. If this is an option you’d like to have, look for an SSD that includes a data migration kit offering an alignment tool, or purchase one separately. These kits used to be more common – as of our most recent update, the only widely-available one comes from Kingston. Note, of course, that you must take into consideration that your existing hard drive may be larger than a new SSD, which means it might have more data than can fit on an SSD.
What’s the Guru’s advice? Take this opportunity to start with a fresh OS installation. It’s worth the extra effort to know that the SSD is operating at peak efficiency!
Preparing an SSD for Real-World Use
The final step in using an SSD is learning how to use a drive with a bit less space on it than the typical hard drive. There are two operating system tweaks that you should make to ensure that you’re not losing a lot of space on your SSD. Windows automatically sets up a “page file” on your OS drive equal to the size of your total system memory (RAM) amount. It also creates a hibernation file, also equal to your RAM amount, to enable the system to be hibernated with power off without losing data. If you have 8GB of RAM, Windows has will claim 16GB of your precious SSD space. But taking back this SSD space is relatively straightforward, as described below:
Step One: The Page File
The reason Windows creates a page file is that in the past, RAM has been very expensive relative to the cost of an entire system, and therefore most users did not have a sufficient amount of memory to run typical programs without quickly running out. So the operating system uses the system drive (in this case an SSD) to “extend” the memory into a page file. If you have 4GB or less of RAM today, you should just let Windows use its default setting, which is to create a page file equal to the RAM size, in this case 4GB. We’ve found that many applications will simply fail to launch when using 4GB of RAM with a smaller page file. But if you have more than 4GB of memory, you’re using precious SSD space as system memory when you likely have enough RAM to avoid doing so. Therefore, reduce the page file size (but don’t eliminate it).
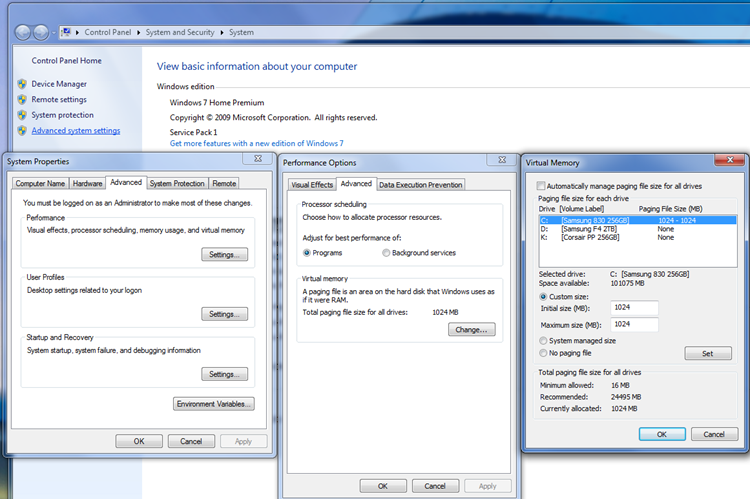
A good rule of thumb is to allow Windows to use 1GB of drive space for a page file, as many applications are programmed to look for it, even if with larger amounts of RAM, they don’t really need it. Finding the setting requires a bit of digging, but we’ve got a map below to illustrate this below. Here’s what it shows: (a) right-click on “My Computer” in the Start Menu; (b) select “Advanced system settings”; (c) click the “Settings” button under the “Performance” heading; (d) click the “Advanced” tab in the next window and then the “Change” button under “Virtual Memory”; (e) select your SSD from the list, then select the radio button for “Custom size”, and then type in 1024MB (1GB) in each of the two boxes. Now you have an SSD-friendly page file of 1GB and you can go on with your day…or proceed to step two! Note that the instructions above apply to Windows 7. If you’re using Windows 8, you can simply type “System” while on the Start Screen, select the System option that pops up, and then continue to step b above.
Step Two: The Hibernation File
This issue is a bit more complicated, as for some users, particularly laptop users, hibernation is very useful, since you can hibernate and unplug your system without losing whatever you’re in the middle of working on. So this is really up to the particular user, but keep in mind that a hibernation file equal to your RAM size will be created automatically if you have hibernation on, even if you don’t use the feature. And shutting it off is not enough – the file sticks around until you issue a very particular command to delete it. Luckily, Microsoft has provided an automated widget to turn on and off hibernation and delete the hibernation file in Windows 7. Note that for Windows 8, there is no automated process for deleting the hibernation file, and furthermore, Windows 8 uses the hibernation feature to speed up the boot process on any system, so it’s probably worth just leaving the settings at default on Win 8/8.1.
Another thing to know now that you’re ready to use your SSD is that the common tech advice of “just defragment your drive” does not apply to SSDs. They do not get fragmented like hard drives, and running a defragmenting utility on an SSD will actually reduce its lifespan without improving its performance by performing a huge number of unnecessary writes to the drive. Once you’ve used an SSD, you’ll likely forget all about the need to run a defragmenter, but just in case it occurs to you to try it on an SSD – don’t!
Setting up an SSD and a Hard Drive in the Same System
Assuming you are like most computer users and have lots of media (music, photos, videos), you’ll probably need a hard drive in your computer to store all that data. An SSD is typically too small for such files (and you don’t need the speed of the SSD for opening them). So you’ll need to install a hard drive as well, and there are three tricks to that.
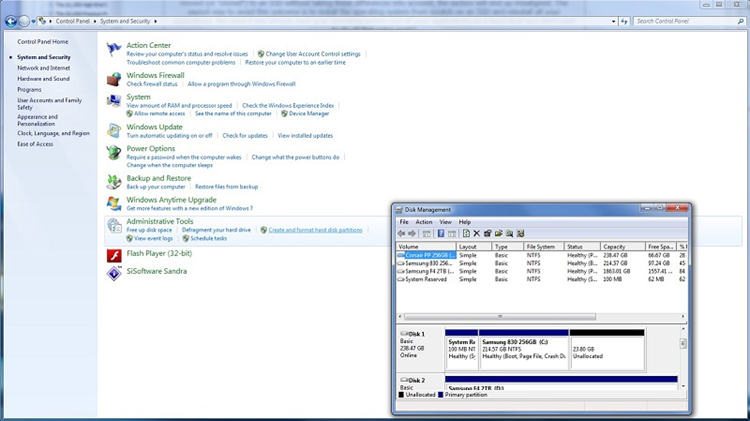
First, you need to allow the operating system to see the second drive, which requires creating and formatting a hard disk partition using the Windows Disk Management Control Panel, pictured below (again in Windows 7, although the control panel is identical in Windows 8). You’ll just need to right-click on the name of your hard drive and “initialize” the drive, and then create a volume name for it (for instance D:). The screenshot here shows where you’ll find the link to open Disk Management as well as the application itself.
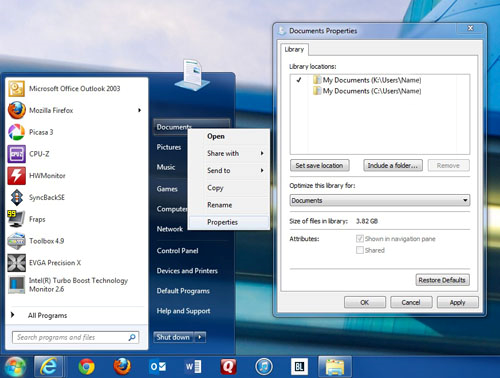
Second, you need to point the operating system to your second drive to use it for your Documents folder. Notice below that when we click “Properties” on the “Documents” link in the Start Menu, it opens up a dialog box that allows additional folders to be added for saving your Documents. In this case there are both C: and K: drives added as possible locations, but we don’t want our files going to C:, because it will fill up too quickly. So we set K: as the save location, and would then highlight C: and remove it. Note that this does not delete the folder – if you have files there, they’ll stay there, but you’ll probably want to manually move them to the new My Documents folder that you create on your hard drive, as you otherwise won’t see them when you open Documents the next time. Follow the same steps for Pictures, Music, etc., to ensure that you aren’t filling up your SSD with big media files.
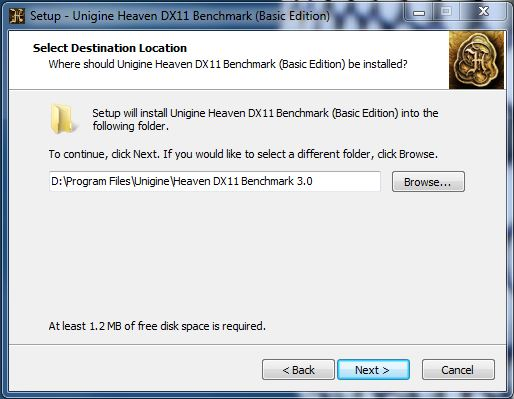
Third, when you install new applications, you might have to give some thought to whether there’s enough space on the SSD to install the application, or whether you want to use up that precious space for an application you don’t use often. Every software installer will allow a “custom” installation – each installer works a bit differently, but just look around for an option to change C: to whatever your hard drive label is. Below you’ll find an example of a simple installer that allows the user to manually type in another install location, in this case the D: drive.
So that’s it – we’ve covered all the basic tricks to getting the most out of your new SSD. But perhaps you have one more question…
So, How Fast in an SSD Anyway?
Any SSD is much faster than a hard drive, but the newer, higher-end models are much, much faster. Take a look at the benchmarks below as measured by the utility CrystalDiskMark. The results on the left are for a Samsung 830 256GB SSD. The ones on the right are for a Samsung F4 2TB hard drive.
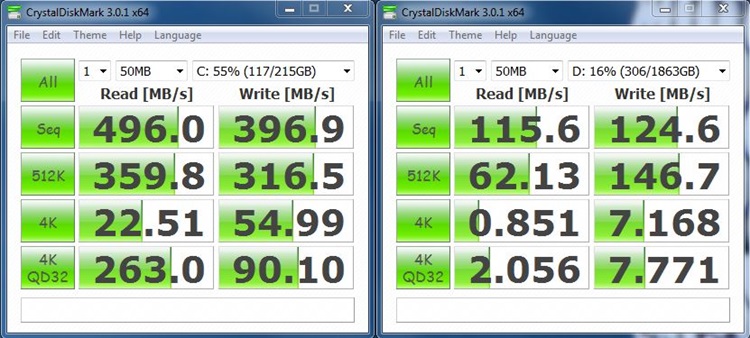
Notice that the first row of numbers, labeled “Seq” (short for sequential large files, which are stored all in one place on a drive) are much higher on the SSD, representing performance nearly four times as fast. That’s a big improvement. But look at the third row, labeled 4K. This is a rating of each drive’s ability to select small files in random locations on the drive, which is how most operating system components are actually stored and accessed. Yes, you’re reading that right – the SSD is not just faster, it’s orders of magnitude faster, at least at reading small random files. In this case, it’s 26 times faster. And this is what makes SSDs revolutionary to the world of home computing. Opening windows, switching windows, opening multiple applications quickly – that’s where all those little random searches for information on a spinning hard drive platter really add up. The hard drive’s “read head” actually has to physically move around looking for information. Sounds like a real chore!
So the moral of the story is…no matter what you use your computer for, an SSD will help. The entry price is a bit steep, but consider it an investment in your own time. You’ll appreciate it!