SilverStone GD09 ATX Case Review
Pros
Cons
Rating
Introduction
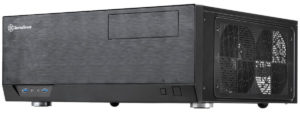
The Tech Buyer’s Guru is at it again, reviewing yet another case. This is our 18th case review (with number 19 and 20 already in the works), so at this point we have a pretty good handle on what it takes to make a great case, from full towers to ultra-compacts. And we’re going to ruin the surprise just a bit and jump to our overall impressions of the SilverStone GD09 home theater PC chassis: it’s great! In fact, it’s so great that we think anyone even remotely interested in building a home theater PC should at least consider it. So is that the whole story? Well, of course not. Read on to learn more about all the GD09’s strengths, its minor drawbacks, as well tips on how to build up your own PC inside the GD09!
We purchased our sample SilverStone GD09 at retail. It is currently available from Amazon for $74.99 shipped.
Description and Features
Let’s start with the specification that really sets the GD09 apart: size. It’s 17.3″ wide, 6.7″ tall, and 14.1″ deep, with a total volume of just 26.8 liters. That makes it the smallest ATX case currently on the market. In that regard, it may be interesting to a lot of PC builders, but of course it’s aimed at home theater enthusiasts. While we wouldn’t call this case a true Small Form Factor PC chassis, it’s still compact enough to fit a lot of places where typical ATX cases won’t fit.
With that being said, we didn’t want to go easy on this case – we built it up with enthusiast-class components to make sure it could handle them. Here’s the list of parts we used to put it to the test:
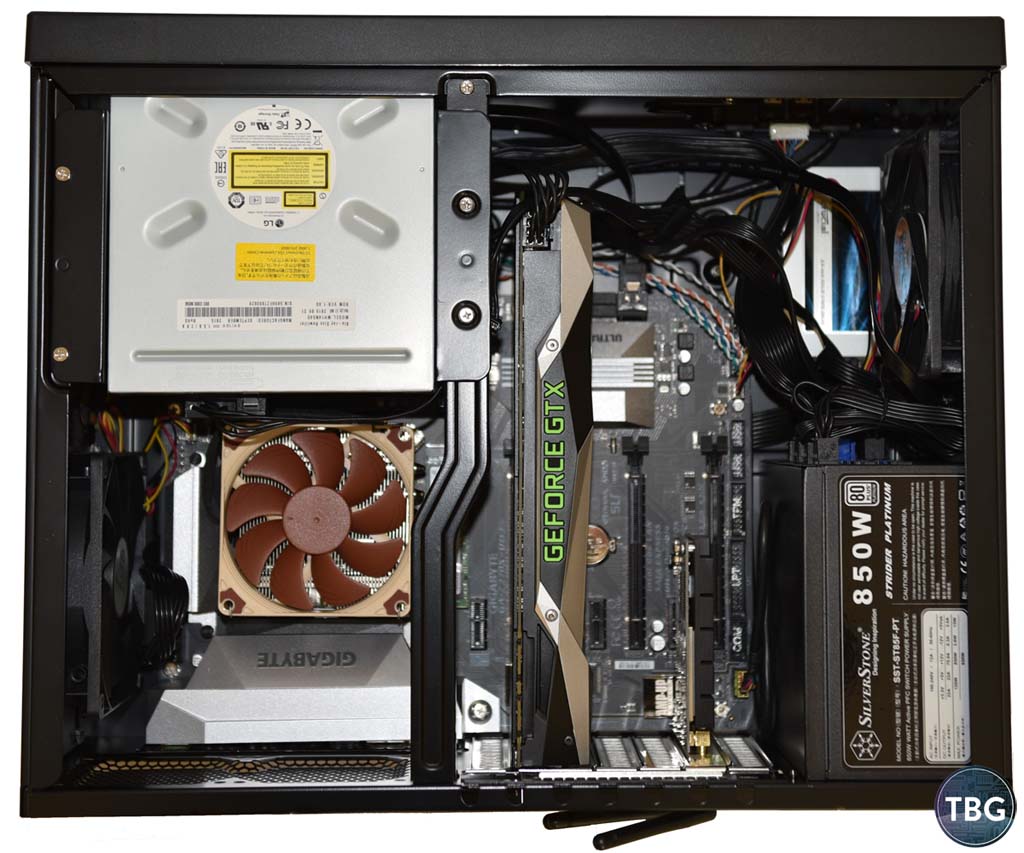
- CPU: Intel Core i7-7700K
- Motherboard: Gigabyte GA-Z270X-UD3
- Video Card: EVGA GeForce GTX 1070 8GB Founders Edition
- RAM: Corsair 4x8GB Vengeance RGB DDR4-3000
- SSD #1: Samsung 850 Evo 500GB M.2
- SSD #2: Crucial MX300 1TB 2.5″
- Hard Drive: Samsung Spinpoint 2TB 3.5″
- Optical Drive: LG WH14NS40 Blu-Ray Burner
- CPU Cooler: Noctua NH-L9x65
- Case Fan: Scythe Kama Flow 2 120mm
- Power Supply: SilverStone Strider 850W Platinum
- Wireless Adapter: TP-Link Archer T8E 802.11ac
- Operating System: Windows 10 Flash Drive
This is a fully-equipped build, as we wanted to determine just how well a lot of full-size gear could fit in this compact case. In the end, all of this worked great, but there were a few other configurations that we tested that did not work, and we’ll discuss that more on the next page.
There’s quite a lot going on inside the GD09 given how small it is. You have a full cross-brace, which is unusual in a case at this pricepoint, and allows the user to stack other gear like an AV receiver, on top, or alternatively a monitor if that’s the preferred setup. In terms of cooling, SilverStone provides a single 120mm fan, mounted from the factory as an intake next to the CPU mounting area (in the photo below, we’ve switched it to exhaust, reasons for which we’ll discuss later). Two additional 120mm fans can be mounted in the case (one next to the pre-installed fan, one next to the power supply on the other end of the case).
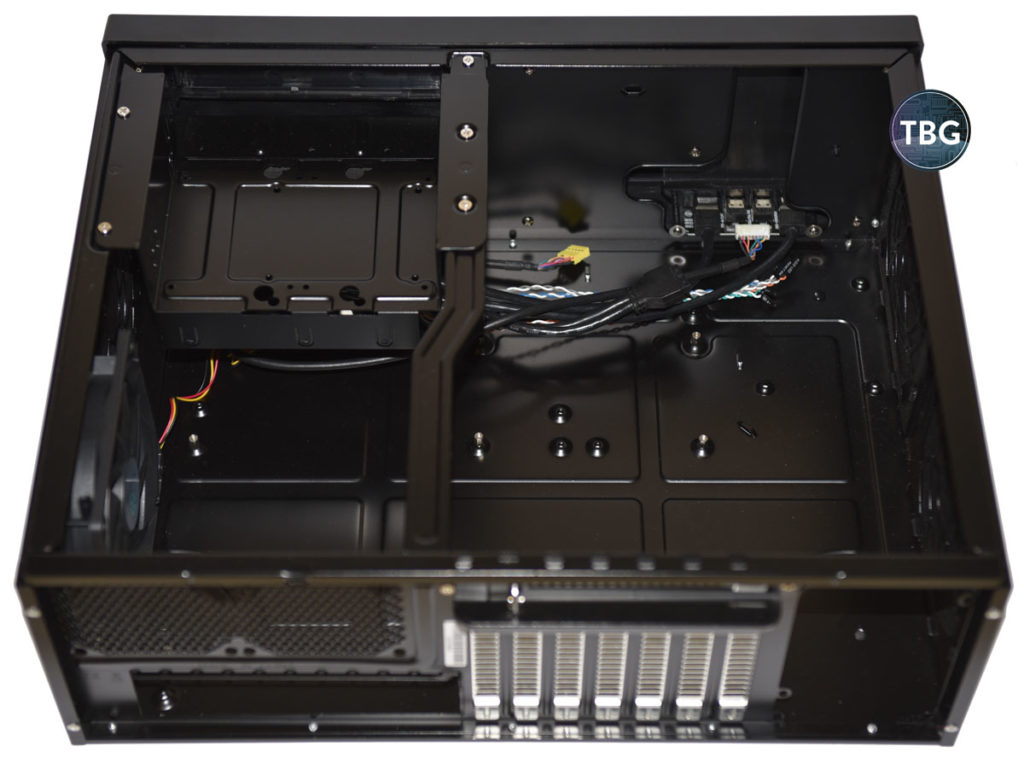
Moving to the front of the case, you have the cable connectors (HD audio, USB 3.0, power and reset), and then you have the nifty multi-purpose drive tray in the corner of the case. This tray can hold one 5.25″ external device (the most obvious choice being an optical drive), plus one 3.5″ hard drive or two 2.5″ drives. You can also forego any external drives and use the top half as a 3.5″ drive bay. Amazingly, hidden underneath is yet another 3.5″ drive bay, oriented vertically and against the front of the case. So SilverStone gives you a lot of options here, although you do have to pick and choose: you can mount three 3.5″ drives if you mount nothing else in the bays, and this is what a lot of folks running content servers may want to do.
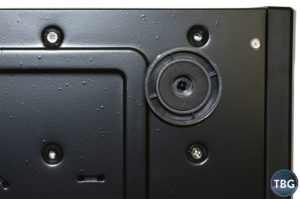
The one thing we haven’t mentioned yet is the dedicated 2.5″ drive mount, which is really just that: a mount. It’s not a tray or a caddy, and in fact is just four holes punched through the floor of the case that let you attach a 2.5″ drive to it. Thankfully, these holes are at least countersunk so screw heads don’t poke out the bottom, but we really think SilverStone should provide a caddy that slides into place. It was pretty inconvenient to place the case on its side, with one hand inside holding the SSD in place and the other hand outside attempting to affix the screws. This is one of those PC building situations where you ideally have three hands, which means something just isn’t right about the product design. Furthermore, flush-mounting an SSD is always going to be really questionable, because power and SATA cables often won’t fit properly pressed up against the floor of the case. For example, we could not attach the end of our SATA power cable daisy chain to this drive – we had to use a middle connector, which provided a greater amount of bend. If this all sounds a bit too in the weeds for you, trust us when we say that if you choose to purchase the GD09, you’ll end up agreeing that SilverStone could have done a better job.
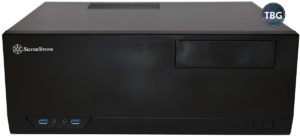
On a positive note, the fit and finish of this case is extraordinary. The paint job has a texture to it, which we assume was intentional – getting that much dust and dirt into the paint mix would be pretty unlikely! We really liked the chrome-plated screws used throughout the case, which give it a touch of class, as do the chrome-plated rear vent covers. The case is made of steel, while the front panel is plastic with a “faux aluminum” finish. We think it looks just fine, and is a good compromise to hit a low pricepoint. Yes, real aluminum would be ideal, but it would probably add $20-$25 to the cost of the case. In fact, SilverStone markets a nearly identical case, the GD10, with an aluminum door over the plastic fascia, and it costs around $95.
All right, now that we’ve covered the basic description and features of the GD09, let’s see what it’s like to actually build up a system in this case.
Assembly
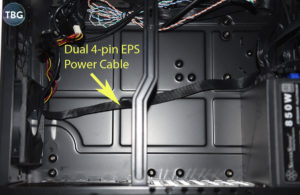
There are a few “gotchas” when it comes to assembling a PC in this case, resulting from its compact design. The first thing you’re going to want to do when building a system in this case is to install the power supply. While you might be tempted to install the motherboard, you’ll regret that decision quickly due to a quirk in this case’s design. Specifically, there is no panel behind the motherboard – just the bottom of the case. That means traditional “cable management” goes out the window, as does common cable routing tricks. What we found right away was that our power supply’s 12v EPS 4+4-pin connector (also known as a CPU power connector) could not be routed to the top of the motherboard where it’s needed unless the cable went under the motherboard. And because there is no back panel, you can’t get that cable under the motherboard unless you lay it there before the motherboard is in place. Potential purchasers of the GD09 – consider yourself forewarned! There is one other serious gotcha when it comes to the GD09 case, and we’ll get to that later on this page.
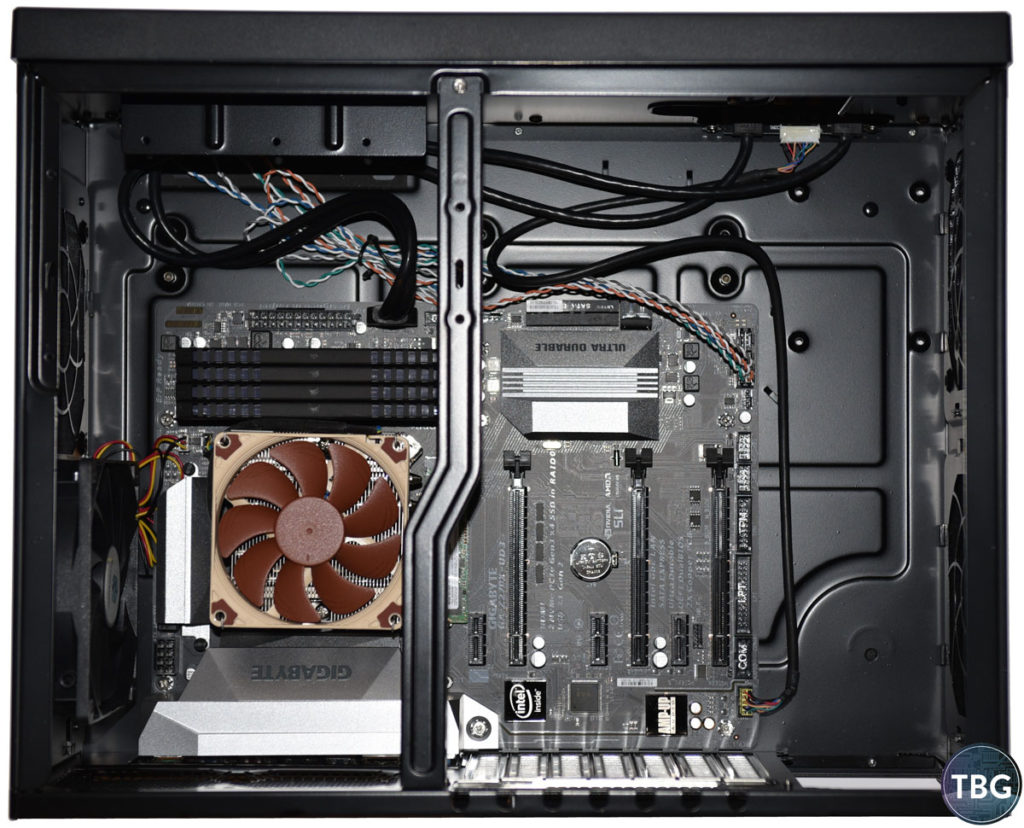
Luckily, once the power supply (and its cables) were properly installed, the motherboard went in without a hitch. Note that we pre-assembled it outside the case, as you must with any third-party CPU cooler on Intel’s mainstream platform, given that there is no rear motherboard access. If you’re using the stock Intel cooler, an AMD Ryzen CPU, or an Intel X99 board, you won’t face the same restriction, but you’ll probably want to install the cooler outside the case just for easier access. The crossbar running down the middle of the case can be easily removed, although we didn’t find that necessary with our low-profile cooler installed. And yes, you will want a low-profile cooler… again, something we’ll get to in a moment. Note that in the photo below, we’ve removed the power supply to give a very clear view of how the motherboard fits in the case without all the power cables getting in the way.
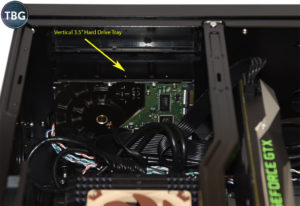
Once you have your motherboard and power supply in the case, you can work on installing hard drives. The sole dedicated SSD “tray” is simply the bottom portion of the case above the power supply area, which we discussed on the previous page. It’s not ideal, and it’s certainly not fancy, but it works, sort of. Much more impressive are the dedicated 3.5″ and 5.25″ drive bays. In the accompanying photo, you can see the creative vertical bay right up against the front of the case. While we appreciate that SilverStone has really fit in a lot of hard drive mounting options, this front tray (which is equipped with anti-vibration padding, by the way), isn’t ideal for hard drive thermals, so we chose not to use it in the end.
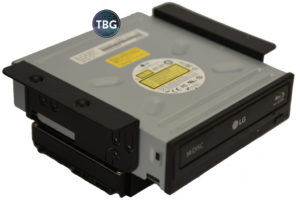
Instead, we placed our hard drive in the “hanging” tray underneath the 5.25″ bay. This was very easy to use, as the entire tray comes out, and it puts the hard drive right in the line of airflow, assuming you install additional case fans beyond the single fan the case comes with from the factory. You can see the entire bay assembly, with hard drive and optical drive mounted, in the photo here. Note that because the optical drive actually needs to be installed through the front of the case, this is for illustration purposes only. You can’t actually drop the entire bay in with the optical drive attached.
Now comes the big problem with the GD09’s design: the drive tray overhangs the motherboard to such a significant degree that it essentially makes the use of high-end CPU coolers impossible. We tried a variety of arrangements, including several that clearly should have worked according to SilverStone’s published specs. Let us quote from the GD09 manual:
The GD09 has 138mm height limitation for CPU cooler and clearance of 8mm beyond the motherboard. If no optical drive is installed, there is 170mm of room from the front panel to the motherboard edge. The clearance below the optical drive is 88mm.
Uh, huh. Well, here’s what we learned: none of that is at all relevant in the real world. The hanging 3.5″ bay actually interferes with any large low-profile cooler, while the optical drive will make it absolutely impossible to mount any tower cooler. SilverStone suggested that some tower coolers will work if you mount the fan on the exhaust side (i.e., the wrong side) of the cooler. Yes, well, that’s technically true, but we’re not going to go on record supporting that installation method. As far as we’re concerned, you should be using a stock Intel cooler, the Noctua NH-L9x65, or AMD’s new Wraith Spire (shipped with mid-range Ryzen processors). As can be seen below, the installation of larger coolers like the Noctua NH-C14S or SilverStone AR08 went south very quickly. Our word of advice: don’t chance it.

Next, we’ll discuss our impressions of the case from a cooling and acoustics point of view.
Performance
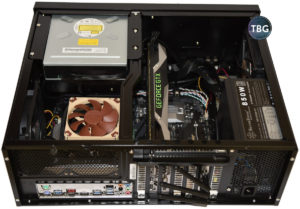
Once everything was pieced together, it was time to put the GD09-based build to the test. In terms of CPU cooling, we had absolutely no problems running our Core i7-7700K at stock speeds using the low-profile Noctua NH-L9x65 cooler. Even with the CPU at 100% load running at 4.5GHz on all cores, temperatures never exceeded 72° C. We used a fixed fan profile that kept the CPU fan running at just 1300RPM until the CPU hit 70° C, meaning it was virtually silent up to that point. Users are always free to tailor a custom CPU fan profile according to their needs using modern motherboard UEFI or Windows software, and we strongly encourage that approach when setting up an HTPC. It’s quite likely that the typical HTPC will never see 100% load, meaning the fan can be run at a very moderate speed.
Take note that we tested this system with a high-performance video card (the EVGA GeForce GTX 1070 8GB Founders Edition), and for that reason we chose to install an intake fan next to the power supply and flip the orientation of the pre-installed fan, creating a natural flow from the left side of the case (as seen from the front) to the right side of the case. Additional fans will not be necessary for builders using this case exclusively for home theater duty, as HTPC-centric video cards produce very little heat. You can see the extra fan mounted below, right next to our SilverStone power supply. Note that this ultra-compact 140mm-long PSU made it easy to install both cables and that extra fan. We’d strongly recommend against the use of power supplies any longer than 150mm, as they’ll likely make it impossible to install a fan in the adjacent fan slot once required power cables are attached. We might as well take this opportunity to mention the high-quality snap-on dust filters that cover all fan air intakes. While we’d like these even more if they were magnetic, the inclusion of effective dust filters on a case at this pricepoint is still admirable – many inexpensive cases have totally useless dust filters that are simply for show.
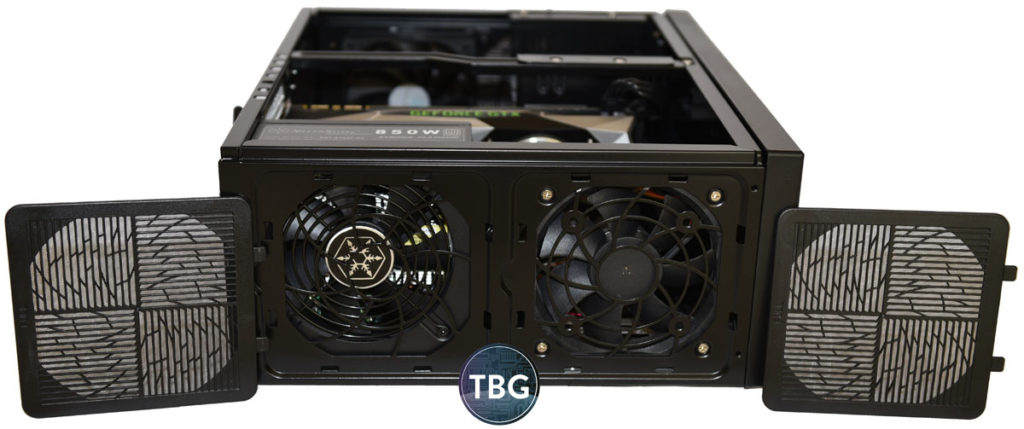
So how did the case handle a gaming load? It did well enough for HTPC purposes. During an intense Battlefield 1 multi-player session, our CPU topped out at 70° C, while our GTX 1070 hit 75° C at stock settings and 77° C at its maximum overclock. That of course is with an optional fan installed and the stock fan flipped to work in concert with the GPU’s cooling. In the default configuration, we really wouldn’t try gaming with this level of video card. Frankly, we wouldn’t go much higher than a 150W GPU like the GTX 1070. There just isn’t enough airflow on tap. And take note: not only would custom-designed open-air cards fill this case with more hot air than it can handle, most won’t even fit due to the height restriction (5.25″) that this case has. Remember, you have to save room for power cables!
As for the pre-installed SilverStone 120mm fan, we found it more than acceptable. It’s not the quietest 120mm fan you’ll ever find, but it has a very reasonable noise profile, with no unseemly scratching sounds that become all too evident in cheap fans. Furthermore, with a maximum rotational speed of 1075RPM, it’s a perfect match for an HTPC case. As is typical of SilverStone fans, it’s much faster than the rated speed (which is 900RPM, by the way), as SilverStone prefers to be conservative with its capacity ratings. Either way, the goal here isn’t extreme airflow, it’s a reasonable balance of thermals and noise given the typical HTPC usage scenario. That probably means that only minimal overclocking should be attempted in this case – it’s just not made for that, nor should it be purchased with that goal in mind.
Another thing we should note regarding performance is that the case did a great job muffling internal sounds, thanks in part to the anti-vibration padding provided in the hard drive trays, but also very much a result of the solid front panel and nearly-solid top panel. While these design attributes aren’t ideal for thermals, they are perfect for noise suppression, especially with regard to noise that would otherwise be emitted in the direction of the listener (e.g., a user sitting on a sofa enjoying content played on an HTPC). One last nice touch: the front panel lined up perfectly with our optical drive, making the whole affair look very put together.
Conclusion
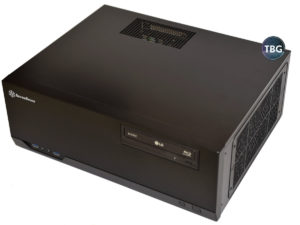
Given its very reasonable asking price of $75, the SilverStone GD09 has basically carved out a niche unto itself. It has essentially no competition at its pricepoint, and in fact could easily match many higher-priced models. Its extremely compact footprint (for an ATX chassis) is a distinguishing feature that any home theater enthusiast will appreciate, as it can easily fit in most AV consoles (and can even be rack-mounted!). It’s not perfect, but it’s pretty close, and the only real downsides we found were limited clearance for high-end CPU coolers, somewhat limited airflow for high-end video cards, and a less-than-stellar SSD mounting system. For the intended audience, none of these issues matter; in fact, while we feel obliged to point them out, as long as buyers know what they’re getting, they really won’t be disappointed.
As of our publication date, the SilverStone GD09 is available for $74.99 shippped from Amazon. Its fraternal twin, the GD10, which adds a locking front panel but is otherwise identical, is available for $93.99 shipped from Amazon. Frankly, we think anyone thinking about build a home theater PC should at least consider the GD09, which we believe is the very best value among all full-size HTPC cases on the market. If you’d like to build your own PC using the GD09, check out our recommended parts selections in our High-End Home Theater PC Buyer’s Guide, updated monthly!

