Building the Smallest, Fastest, Quietest PC Ever! – Project ITX (2014-2015)
Introduction
 So, if you know even a little about building PCs, you’ll realize right off the bat that the title to this article is meant to be a bit tongue-in-cheek. Building small, building fast, and building quiet are goals totally at odds with each other, so the real goal here is optimization. How small can a system be and still be blazing fast? If you’re lucky, you also get something’s that’s quiet, at least most of the time
This article is not meant to be a build guide, but rather an exploration, because pushing the mini-ITX format to its limits, as we do here, is rife with challenges. Furthermore, in the world of ITX, just about every case really warrants its own dedicated guide. Our Small Form Factor Build Guides provide plenty of options that will be relatively straight-forward to build and will perform well. But none of them will offer the combination of extreme speed and incredibly compact dimensions that you’re going to see on display with Project ITX. In fact, Project ITX is always evolving, and while we originally published this article in August 2014, we returned to it a year later to bring you some major updates and further impressions on what it takes to build small and fast. Feel free to skip to the last page of this article if you just want to see the latest incarnation of Project ITX.
Fasten your seatbelts, it’s going to be a bumpy ride!
We started out Project ITX with three goals:
- The case had to be under 8” tall, because we needed it to fit on our AV rack. That meant the 8.1” tall CoolerMaster Elite 130 was out of the question (and frankly, it was too long as well). That also knocked out the even bigger BitFenix Prodigy and other similarly-shaped ITX cases.
- The case had fit our fire-breathing 10.5”-long EVGA GTX 780 Ti, because we were going to be gaming at 4K, and that’s just how it was going to be. So Silverstone’s ultra-small Sugo 05 and Sugo 06 models weren’t going to work. [Update: Silverstone’s new Sugo 13, however, would work in this regard.]
- We wanted to try going with a fanless CPU setup using a big Cooler Master GeminII S524 heatsink, which measures 105mm tall without a fan. That pretty much knocked every other ultra-compact case out of contention, except one…
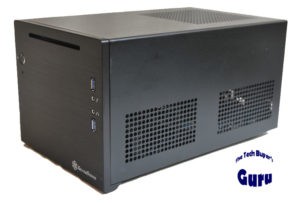
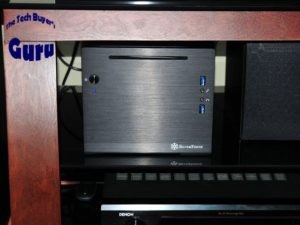
At least on paper, the Silverstone SG08B-Lite could work. At 8.7″ wide, 7.5″ high, and 13.8″ deep, it’s very, very small. But did Silverstone really create ITX nirvana in the SG08? We aimed to find out!!!
Next, we had to settle on the rest of our parts. We weren’t so much operating on a budget here as we were operating within space constraints. We selected the new Intel Core i5-4690K based primarily on its improved thermal interface material, which we hoped would allow it to run at full-bore without overheating. That was particularly important because we weren’t just going to go with a quiet CPU cooler, we were going to go passive. And to wrangle that big passive cooler in, we needed just the right motherboard. We went with the ASRock Z97E-ITX motherboard because its CPU socket is located at the very top edge of the board, making it the only motherboard on the market that would allow the use of the GeminII cooler in an ITX case. In fact, it came within about a millimeter of not working.
Also, no open-air video card capable of pushing 4K resolution was going to see the insides of this ITX system. The case’s airflow just wasn’t going to be sufficient. That meant all of AMD’s best Radeons were off the list. Instead, we went with the EVGA GTX 780 Ti, using the externally-exhausting reference cooler from Nvidia.
Finally, we wanted a modular power supply, because cable clutter is not our thing, and we knew that for this build, we’d only use about half the cables provided on a standard PSU. But alas, Silverstone threw a wrench into the plans right from the start. Despite listing “compatibility” with 12”-long video cards, the SG08 actually only allows this if you use a 140mm non-modular power supply. That was a trade-off we were not willing to make. So we went with a 140mm modular unit from Corsair and prayed it would work. Turns out it would take more than praying to get this thing to fit….
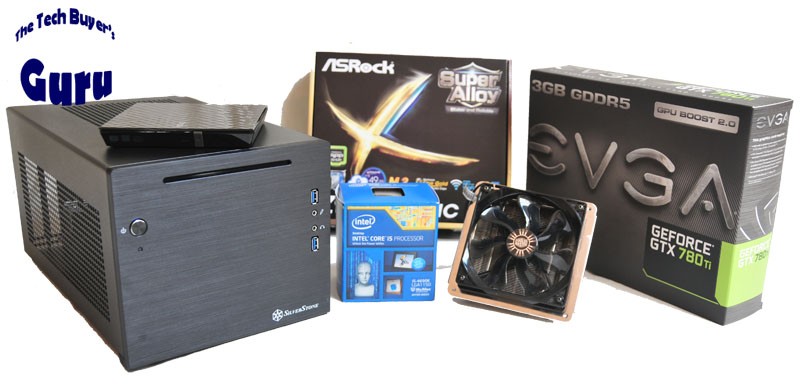
Here’s the final parts list:
- CPU: Intel Core i5-4690K
- Motherboard: ASRock Z97E-ITX/ac
- Video Card: EVGA GeForce GTX 780 Ti 3GB (later upgraded to the EVGA GeForce GTX 980 Ti 6GB)
- RAM: G.Skill RipJaws 2x4GB DDR3-1866 (later upgraded to Samsung 2x4GB Extreme Low Voltage DDR3-1600)
- Hard Drive: Seagate 1TB 2.5″ SSHD (later upgraded to the Corsair Force GS 240GB)
- Power Supply: Corsair CX500M (later upgraded to the EVGA Supernova 650 GS)
- Optical Drive: Asus External USB DVD Burner
- CPU Cooler: Cooler Master GeminII S524 (discontinued, current model is the Cooler Master GeminII S524 Ver. 2)
- Case Fan: Scythe S-Flex 120mm (later upgraded to a Rosewill Hyperborea 140mm to reduce temperature/noise)
- Operating System: Windows 8.1 (later upgraded to Windows 10)
- Keyboard/Mouse: Logitech K400
- Game Controller: Microsoft Xbox 360 Wireless Controller for Windows
- Display: Samsung UN55HU8550 55″ 4K LED TV
A couple of final notes before getting into the build. We went with a Seagate hybrid hard drive because top-end application speed wasn’t as important as having a large amount of storage in a very small space. It turns out that a large SSD would probably have been a better long-term solution, as will be discussed later. Also, because the SG08 doesn’t come with any pre-installed fans, and because we weren’t crazy enough to think that a system with these specs would run without any fans, we pulled a trusty Scythe S-Flex fan from our parts box. The S-Flex is no longer available – too bad, as these fans were worth their weight in gold. Oh, one last thing – we weren’t going to bother with an internal DVD burner, especially because this case requires a very expensive slot-loading model. We simply used our external Asus model to get everything loaded up. Turns out we weren’t going to have space for an internal burner anyway once we were done modding this thing anyway…
Are y’all ready for this?!?
Building the Box
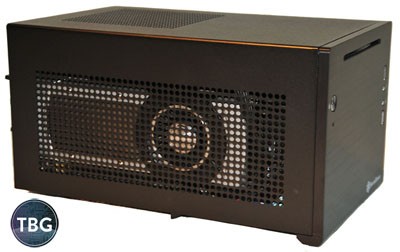
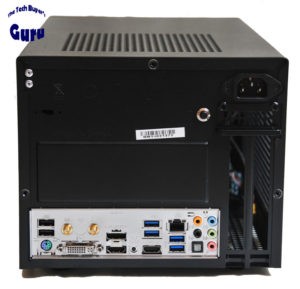
 The first major challenge presented by this build was the very limited number of cooling vents on the right side and rear of the case. Perhaps Silverstone thought that it was conjuring up some special airflow voodoo here, but we’d say it’s a flat-out bad design. Not enough points of entry or exit once you install a video card in this case. So we knew we’d need to optimize our semi-passive setup to the utmost to make it work here. Note that because Silverstone has designed the case to direct all CPU and motherboard heat out of the little vent on the lower-right side of the case, a tower-style cooler cannot be used with this case, even if it fits. As shown below, there is zero venting in the rear of the case. Shame.
The next challenge we faced was one that we knew Silverstone had set up for us. The power supply was supposed to be non-modular in order to fit a video card in the case. But it was far worse than we had imagined. We thought we could cut down on modular cables just enough to get a 10.5” video card in without overlapping the modular jacks. We needed at least three modular cables in addition to the fixed motherboard and CPU cables on our power supply: one SATA power cable and two PCIe power cables. These simply weren’t going to allow our GTX 780 Ti to be installed (but would probably work fine with a video card 9.5”-long or shorter).
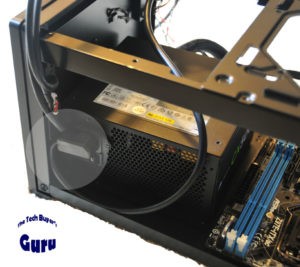
Unfortunately, we ran into another problem that we hadn’t anticipated, and apparently, neither had Silverstone. As shown to the right, the PSU’s power plug hit the cable box for the front-mounted USB 3.0 and audio ports, as shown at right. Silverstone may have tested this case with its own Strider series of power supplies, but it certainly didn’t try to install one of the most popular modular power supply series on the market, namely Corsair’s CX line. Power supply plug placement is not standardized, because with 99.9% of builds, the plug sits outside of the case, where there are no clearance issues. But this is Project ITX, so things are not going to go according to plan.
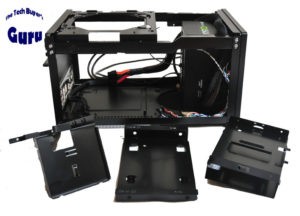
So we did things differently. We jacked the PSU up and transverse-mounted that puppy. Of course that meant that the custom-made power supply bracket, the optical drive mount, and the hard drive caddy, all shown to the left, were getting tossed. Just a few of the causalities on the road to Project ITX. Oh, and we had to zip-tie the PSU into place, Yikes! But that freed up plenty of space for the massive video card, and even meant the cabling was going to be a bit easier.
We weren’t through the woods yet, though. Remember, we are installing a huge CPU cooler in a tiny case with no motherboard cutout. That meant that the cooler had to be bolted on outside of the case, and then the entire motherboard/CPU/cooler assembly had to be lowered down into the chassis. That went smoothly enough, thanks to the fact the top fan mount is removable. So, luckily we got it all in, although plugging in all the cables with the motherboard and cooler already in the case was one heck of a challenge. Get your surgeon’s hands ready!
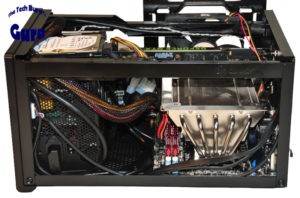
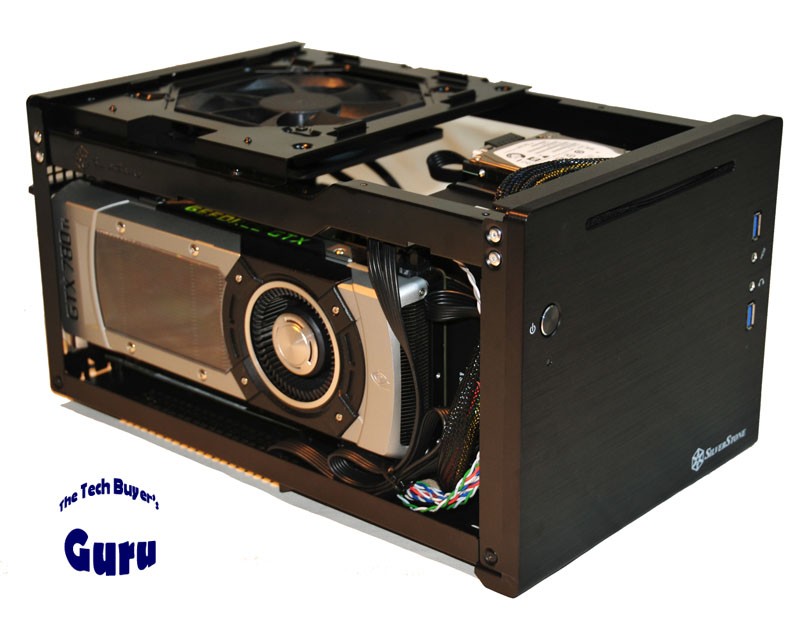
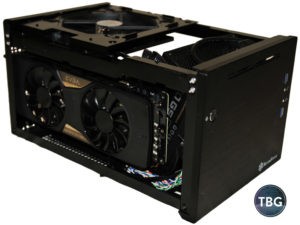
Have a look at that beautiful CPU cooler, installed with nary a fan in sight. Plus, with the transverse-mounted power supply, there’s plenty of room for tucking those big motherboard cables between the board and the PSU. And we still have room for our little hard drive, unceremoniously perched on top of the PSU with double-stick tape. Ah well, it’ll work, but trust us, this little box isn’t going to make it in the mail!
Remember how we criticized Silverstone’s ventilation scheme on this case? Well, the big wall of metal on the side of the CPU cooler wasn’t going to play nice with the puny little vent cut out in the right side of the case, as it basically blocks most of the airflow going to that vent. We’ll solve that problem later, though. For now, let’s take a closer look at how close the tolerances were with this build by checking out a top-down view:
Ouch, is that the CPU cooler coming within a millimeter of the video card? Why, yes it is! And is the end of the 780 Ti actually touching the power supply? Well, it’s awfully close…but ultimately everything fit, and yes, we got darn lucky here, because no one, no matter how detail-oriented they are, could have measured these tolerances within a few millimeters based on published specs, and that’s how tight the confines of this build are.
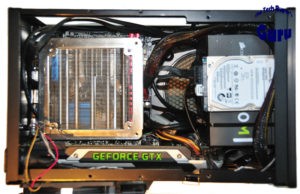
Ok, time to install the one and only fan we’d be adding to this build. In the picture below, the 120mm top-mounted fan is oriented to blow air down on the motherboard. Makes sense for most setups, and it’s probably what Silverstone had in mind when it designed this case. Only testing the system under load, however, would determine if this cooling setup was actually going to work.
A pretty face is nice, but this baby was born to run. So let’s give it some gas!
Performance and Parting Thoughts
Building a mini-ITX system, particularly one intended to offer extreme performance, is always going to be a challenge. We’ve already shared some of the many head-scratching moments we faced as we put this PC together. But just getting it pieced together was only half the battle. We had to push it hard to see if it would hold together under stress. And as we’ve already suggested, we learned a thing or two once we hit the power button.
Of course, the first thing we did was overclock it, because it was supposed to be fast, after all! Now, we don’t typically recommend doing this right off the bat, but we already had a pretty good sense of the limits of our components. So we took the 4690K up to 4.2GHz with a little extra voltage, and then pushed the GTX 780 Ti up by 200MHz on the core (that’s fast!) and 400MHz on the memory.
First up, a 3DMark run just to make sure that Project ITX is able to beat just about every other system ever built….
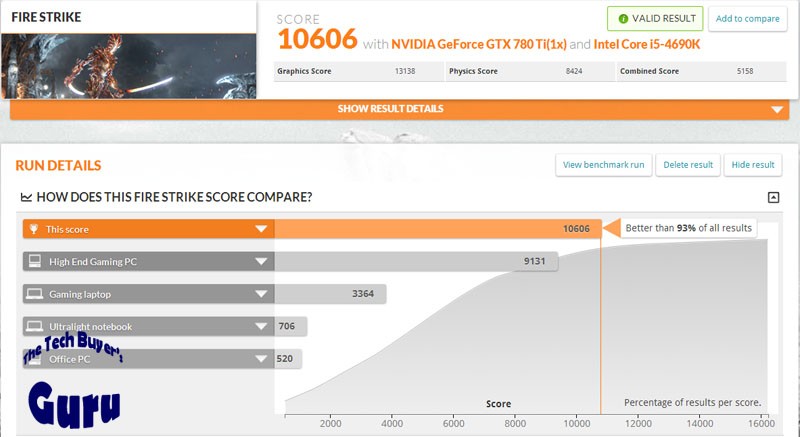
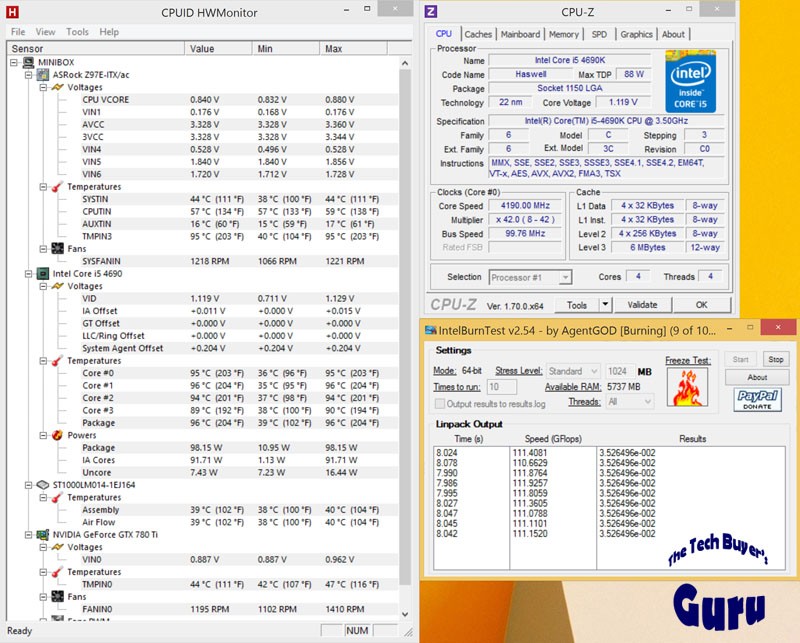
Yup, pretty good. Maybe not a grand slam, but at least a solo home run. We were running a 4.2GHz overclock on this passive CPU, but was it actually stable? What would your guess be if we told you that this system was pulling an incredible 395W in this test? Ouch! To make sure our CPU wasn’t going to give up the ghost, we ran the most strenuous stability test out there, Intel Burn Test. Sure enough, the system got hot, but it didn’t come all that close to throttling, and in our intended scenarios (gaming and HTPC use), we weren’t going to be getting anywhere near this level of load.
Alas, to give the system a bit of breathing room (the CPU is running without a fan, after all), we dropped the overclock down to 4GHz for some extended gaming sessions. And this is where we ran into a brick wall in the form of Silverstone’s odd vent setup. Luckily, simply flipping the top-mounted fan into an exhaust orientation cured our problems:
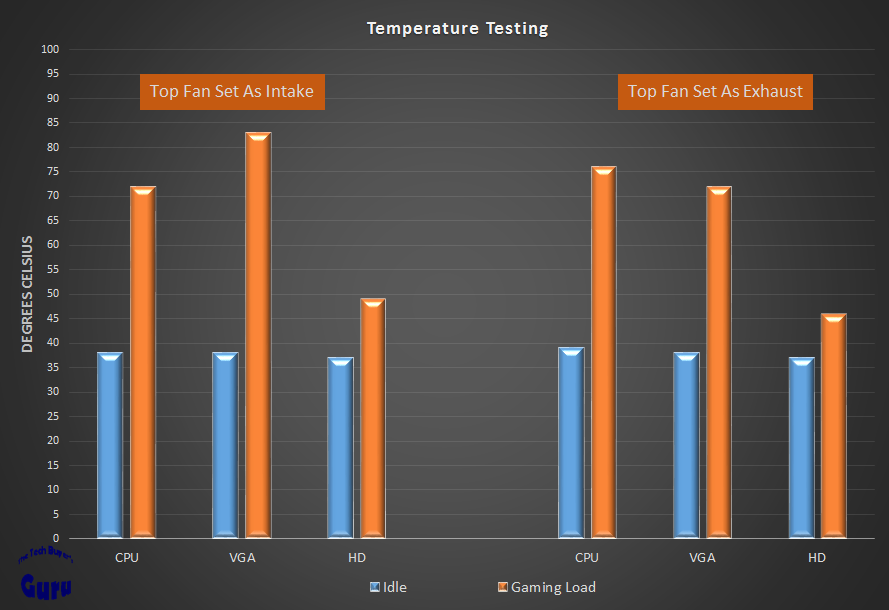
While running the fan as Silverstone likely intended us to kept the CPU fairly cool, it caused everything else to overheat. Our hard drive was hitting nearly 50C, and the video card, well, it was maxing out its cooler, hitting the 83C throttling threshold, and making a racket all the while. So knowing that running our CPU with passive cooling was unorthodox from the start, we decided not to let it bring the whole system down. We reinstalled the top-mounted fan in an exhaust orientation, which raised CPU temps, but dropped the VGA into downright chilly territory, and prevented our hard drive from cooking in its perch at the top of the case. If we were to do it all over again, we’d go with an SSD for this build, as they generate very little heat, and being solid-state, wouldn’t be damaged by the temperatures generated by this system. Amazingly, despite leading to higher CPU temperatures while gaming, the exhaust fan orientation lowered the maximum temperature in Intel Burn Test from 96C to 93C, suggesting that it really was the all-around better setup for this system.
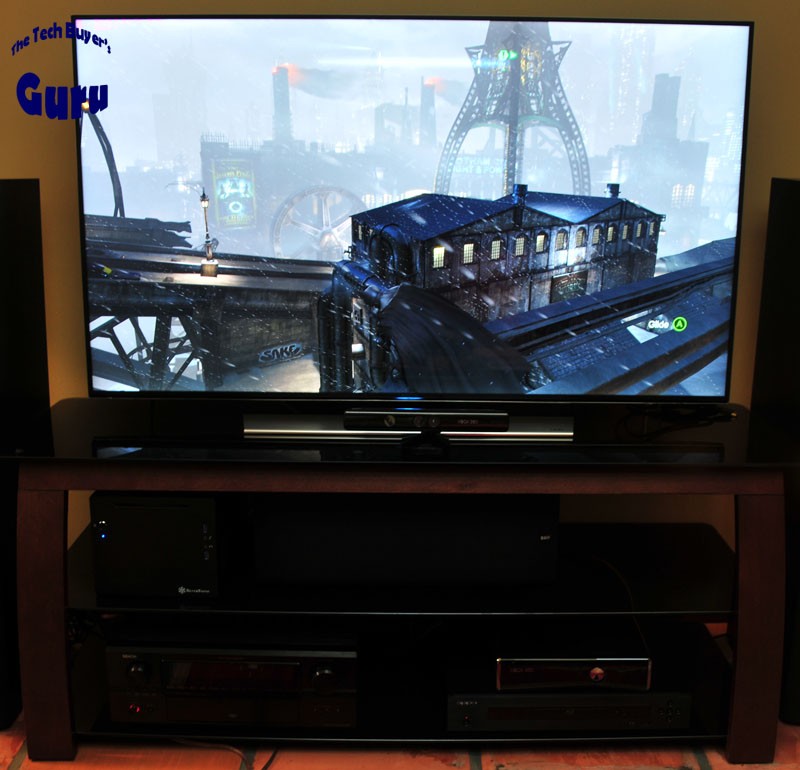
In the end, Project ITX worked, and with a little trouble-shooting, we accomplished all of our goals. It’s fast, it’s small, and it’s quiet. In fact, at idle, with the single 120mm fan spinning at under 900RPM via motherboard control, it’s nearly silent. And even at full tilt it’s not all that loud – the fan spins up to just 1200RPM, and the GTX 780 Ti was well under its maximum fan speed.
Below you can see Project ITX running Batman Arkham Origins at a glorious 4K resolution on our 55” Samsung HU8550. Note that at the present time, no mainstream 4K TVs have DisplayPort inputs, which would support 4K, and no video cards today have HDMI 2.0, which would also support 4K. Talk about a standards mis-match. Luckily, we were able to run 4K over HDMI 1.4 using an awesome driver trick introduced by Nvidia in its R340 series drivers.
 So, what have we learned? Well, first of all, as far as we’re concerned, there is no case on the market that would have let us do what we wanted to using standard components without modification. Yes, there are a few cases using ultra-small power supplies that could probably achieve the same outcome (the EVGA Hadron Air and the Silverstone Raven come to mind), but they weren’t the right form factor for our AV setup, and we didn’t want to get locked into proprietary power supplies.
Alas, building an extreme mini-system can be a bit tricky with off-the-shelf parts, so anyone looking for a little less stress would probably be better off using one of those factory-custom solutions. For everyone else, feel free to start with Project ITX or one of the systems in our Small Form Factor Build Guides, and then get as creative as you want to be!
Wait, is that all? No, of course not! Next we’ll show you how we modded Project ITX a year after first putting this article together…
Project ITX 2015
As we said at the beginning of this article, we actually chose to revisit Project ITX a year later to see if we could wring more performance out of our system, while also addressing some of the pitfalls we encountered initially. Here are the five areas we wanted to improve upon:
- Improving the case cooling, which we found to be somewhat borderline using only a 120mm case fan.
- Upgrade to a more robust power supply that would offer higher capacity and efficiency while still fitting in the tiny SG08 case.
- Find a work-around for an overheating hard drive.
- Moving over to Nvidia’s newer line of Maxwell GPUs, which offer much higher efficiency than the Kepler-based GTX 780 Ti we initially used, along with more VRAM and HDMI 2.0, both critical for fully supporting our 4K HDTV.
- Upgrade to a better OS!
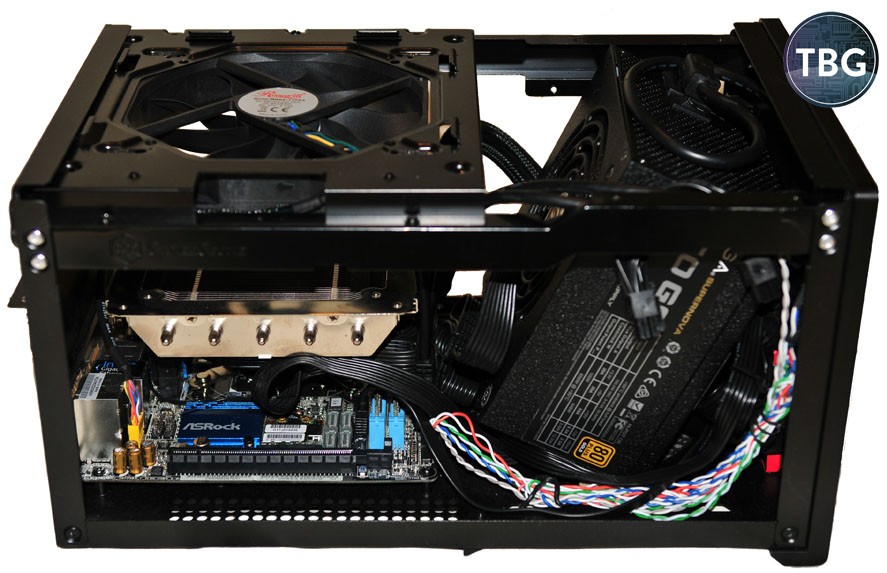
What you can see pictured here is the final result of our efforts, and spotting all the changes might be difficult. Don’t worry, we’re going to walk you through the steps!
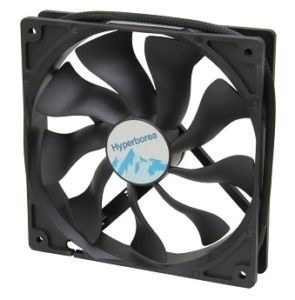
We were never fully satisfied, though, with the temperatures reached by our system, despite their being well within safe tolerances. So we replaced the original 120mm fan used for this build with the Rosewill Hyperborea 140mm Case Fan. It’s the largest fan that can fit in the Silverstone SG08 case. It’s also an ideal pick for this build: it spins up to a maximum of 1,350RPM, can be easily controlled via the motherboard’s 4-pin CPU fan header, and uses a hydro dynamic bearing for low noise even when placed in a horizontal position. Its contoured fan blades produce tremendous airflow with low noise, although in a less directional fashion than straight fan blades. This makes it ideal for an exhaust fan, where you simply want the maximum amount of air to be pushed out of the case (but less than perfect for use on a CPU heatsink or as an intake fan, where you want directional air movement). The results? Nothing short of phenomenal! The maximum CPU temperatures reached under sustained load using Intel Burn Test dropped 10C to 83C, and the gaming load stayed under 60C. Better yet, we set the fan to spin down to 650RPM under idle conditions, and the CPU remained under 40C. We’d finally found the holy grail of quiet computing!
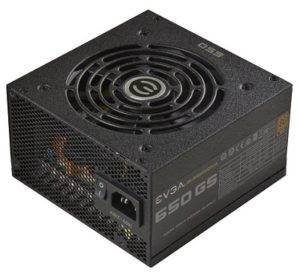
Next, we wanted to upgrade from our Corsair CX500M power supply. We had chosen that unit because of its incredibly-short 140mm depth, which we thought would help us get a modular PSU into a case that notoriously wasn’t designed for one. Well, if you read through the previous pages, we were able to get it to work, but it wasn’t pretty. We had to jettison all of the internal PSU bracing and drive mounts and hike up the PSU on its side, and even then, it was crowding our video card. So we threw caution to the wind and went with an awesome new power supply that would give us three massive upgrades in one fell swoop, the EVGA Supernova 650 GS. It had 150W more capacity, a fully-modular design, and Gold-rated efficiency. And of course, it’s just a better unit overall, having been designed for EVGA by Seasonic. It even offers a very trick silent mode, meaning the fan doesn’t spin until you hit about 300W power draw. Now, this is still an ultra-compact PSU, but at 150mm, it was 10mm longer than our Corsair unit, which wasn’t great given that we were already pushing the limits at 140mm, and furthermore, with fully-modular cables, it was almost certain that some of the cable connections would interfere with the video card. In the end, this proved true – we simply couldn’t have the cables facing the left side of the case, which is how Silverstone had designed the PSU to be installed in the SG08. Since we’d already scrapped the whole PSU mount, we figured why not go for broke and really get crazy? And so we propped the PSU up on its edge, with the modular cables facing the motherboard. A standard PC building approach this most definitely is not! To provide clearance for the cables, we even swapped out our standard-profile G.Skill DDR3 RAM and replaced it with some of the most amazing RAM ever sold, Samsung’s ultra low-voltage “Magic RAM“, and it came to be known by enthusiasts. It’s no longer in production, but luckily we had stocked up on it when the getting was good! This RAM is seriously no taller than the RAM clips on the motherboard, giving us the utmost in clearance for our cables. The photo below tells the whole story, and also gives you a glimpse of the big 140mm spinner up top:
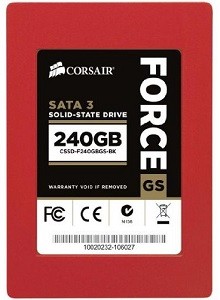
The good news was that propping the PSU up at an angle gave us some space to hide away cables, and also created a nice nook to hide our new solid-state drive, the Corsair Force GS 240GB. We found that running a spinning hard drive in this system just wasn’t ideal, because due to a lack of airflow in the front of the case, it tended to overheat as the CPU and GPU spit tons of hot air into the case. SSDs run much cooler than hard drives to start with, and aren’t susceptible to damage due to the kind of heat that was being generated in our case. So we tucked the Force GS right at the front of the case, where it actually gets a bit of heatsink cooling effect from the solid metal frame of the case. Being an SSD, it also provided a tremendous performance boost versus even the hybrid hard drive we originally tested with this system. Our only wish: that it was even bigger, because boy, 240GB goes fast nowadays!
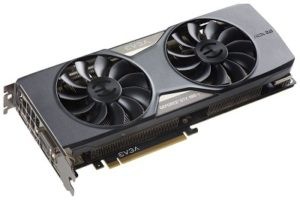
And now for the pièce de résistance: the EVGA GeForce GTX 980 Ti 6GB. Offering up to 50%-higher performance than the GTX 780 Ti that was top gun just a year ago, this beast also offered two other significant benefits: twice the VRAM, which is crucial for 4K gaming, and HDMI 2.0, which is required for full-color 4K output on UHD TVs. We knew that our upgraded power supply could handle this card, in part because it actually doesn’t require more power than the 780 Ti we used previously. Then again, our 500W unit was being pushed pretty close to the limit in our first iteration of this build, so having 650W on tap made us more comfortable moving forward with an even higher-powered GPU. We decided that as long as we were pushing the limits, we’d go ahead and try an open-air cooler this time around, as opposed to the blower-style cooler that our GTX 780 Ti featured. This meant that the card would likely run cooler and quieter, but would end up dissipating nearly all of its waste heat directly into the case, a real risk in an ITX build like this one, especially considering the passive CPU cooling we used. Only performance numbers could determine if this calculated risk would work out in our favor! Note that most open-air coolers actually won’t fit in the SG08, but EVGA had us covered with its 980 Ti model, which has the exact same dimensions as the blower-style 780 Ti (and reference 980 Ti, for that matter).
Last but not least, we installed Windows 10 on Project ITX. Thank you, Microsoft, for giving us the Windows 10 upgrade for free! Honestly, everyone but Microsoft knew from the very start that Windows 8 was a stinker, at least in terms of its user interface, and that the Start Menu simply needed to return. Well, it’s back, and though it’s not exactly the same, it’s most welcome. We’re also digging that really cool new Windows desktop image, which you can see in our screenshot here. And under the hood, there are some very big changes to the graphics API in the form of the revolutionary DirectX 12, which will allow games and virtual reality applications to truly push beyond the limits of the current generation of image quality.
For now, though, we just have our standard DX11-based test suite available to us, so let’s have a look at some numbers, shall we? Just to keep things even, we overclocked the GTX 980 Ti by 200MHz on the core, just as we had the 780 Ti, and boosted the VRAM to 7800MHz, even higher than the 7400MHz we benched on the 780 Ti. Here’s how they compared in 3DMark:

Well, that puts to rest any argument that we’re not seeing progress in the video card world. Focusing on the Graphics Score, we can see that the 980 Ti is a full 52% faster, an incredible delta given that this card came out only 18 months after the 780 Ti, at a lower price no less. The rest of the scores are held back by the fact that the CPU is identical, but for gaming, at least, the video card is king, and here the 980 Ti reigns supreme.
But all is not perfect with our latest creation. Take a look at the temperature data:

Now, the first thing you have to keep in mind is that this machine uses just 30W at idle, running at a near-silent 31dB, and that is simply awe-inspiring. But at load, it shoots up to 390W and lets out a deafening roar. The little beast is not a happy camper. The big 140mm exhaust fan up top helps a lot at idle, dropping the temps on all our components – and keep in mind that the GTX 980 Ti isn’t even spinning its fans to hit 35C! But it’s not enough at load. The problem is that open-air video cards like EVGA’s ACX model simply aren’t ideal for use in cramped enclosures. A lot of enthusiasts believe that the best card is always going to be the open-air card, but when you’re operating in the small form factor world, this is simply false. There just isn’t enough room to exhaust all the hot air that the 980 Ti is blowing directly into the case. And not only is our 980 Ti flirting with the temperature throttling threshold (83C), the CPU and SSD are running very hot. Even worse, while the open-air 980 Ti on its own may be quieter than a blower-style card, the sound level for the system as a whole, at over 48.5dB is much higher. We measured under 40dB for the 780 Ti-based system in a similar test. That’s why our mini-ITX build guides always suggest blower-style video cards. They may not be as “sexy”, but they take the worry out of building small.
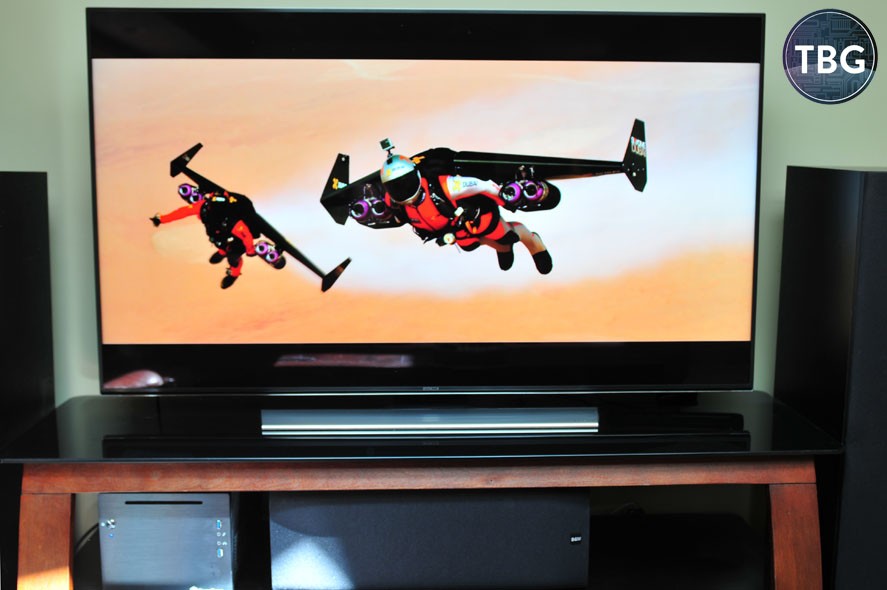
The saving grace of our open-air 980 Ti is that it does one thing a whole lot better than the 780 Ti: perform at 4K. We were able to play several popular games, including Bioshock: Infinite and Assassin’s Creed IV: Black Flag with nearly all settings maxed while sticking very close to the coveted 60fps mark (particularly with Bioshock). And while the temperatures we hit were not ideal, they also weren’t anywhere near concerning. So the overall outcome is very good, if not quite perfect. And of course, 4K isn’t just about games. The 980 Ti can display true 4:4:4 full-color UHD via HDMI 2.0 on compatible HDTVs; below you can see some of our favorite 4K demo material, the Jetman Dubai clip, being run at 4K with UHD color enabled:
So, in the end, we’re happy with the upgrades we made to Project ITX. We got a quieter, more efficient machine at idle, and increased our performance capability by 50% in standard benchmarks, with even greater improvements at 4K. Because we switched to an open-air video card, we ended up with a bit more noise and heat than we would have liked. But overall, we’d say the trade-off was worth it. Pushing the limits of the ITX format is never easy, but it sure is fun!
Update: Since this article was originally published, we’ve put together an Extreme Gaming ITX Assembly Guide profiling an ITX build that’s faster and quieter, while being just a bit bigger. Check it out if you’re after the ultimate ITX experience!